This is the third article on Redmi Note 3.We have already covered the posts on How to unlock the bootloader of your device,install SuperSu and root it.Now in this post,we’ll see how to install a custom rom on your device.
Pre-requisite:
- Redmi Note 3 [SD Variant]. (Obviously!)
- Unlocked Bootloader.
- TWRP Installed.
Required Files:
- Resurrection Remix Nightlies Build (Download the latest build).
- GApps 7.1 (Download the variant as per your requirement).
Steps Involved:
- First of all backup your data
- Download all the required files from the link above and transfer them to your device’s internal storage or USB OTG drive.
- Now boot your device into TWRP recovery mode.To do that,just turn the device off and then press and hold power and Volume Down button until you see the MI logo.Once you see the logo,just release the buttons and your device will boot into TWRP.
- Once you boot into TWRP recovery,tap on backup button,select all the components and swipe to backup.And store that backup on your computer,so that if in case anything goes wrong,we can always restore the backup.
- Now go to Wipe>>Advance Wipe and select everything except your internal memory,SD card and USB OTG.
- Now press back button until you reach the main screen.Here tap on Install and browse the downloaded files.Click on the rom file i.e RR-N-v5.8.1-XXXXXXXX-kenzo-nightly.zip and then and click on app more zips and now select the GApps file.Now swipe to confirm flash.
- Once you’re files are flashed,simply tap on the reboot button.And your device will boot into Resurrection Remix rom.
[First boot always takes some time,so be patient and don’t panic.]
- Once you reach the welcome screen,you need to setup the device like always and you’re done!
PS:This rom still has few bugs,so if you face any bugs or FC’s. Checkout the changelog list from here.
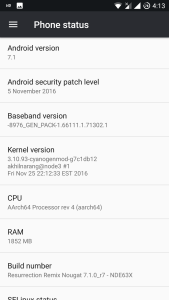
Screenshots:


Credits: Rom Developers,XDA,GApps.
Hope this post helps you.Thanks for visiting the blog.
